
Set that dollar cap before you look at a chart, then size the trade backward from your stop-loss. That planned loss, not your position’s notional value, is what “1%” refers to. Open Myfxbook’s position size calculator or run the formula below before you place the order.
TL;DR:
- Using a dollar risk cap before sizing trades ensures you stay within your planned 1% loss, regardless of leverage or position size.
- Calculating lot size involves dividing your dollar risk by the product of stop-loss in pips and pip value, which varies by currency pair and lot size.
- Adjust your risk percentage based on your experience and discipline, ranging from 0.5% for beginners to 2% only with proven edge and emotional control.
- Market slippage and incomplete fills can cause actual losses to exceed the calculated 1%, so always add a buffer for spread and slippage.
- running a structured pre-trade checklist helps enforce discipline and prevents emotional or accidental deviation from the 1% risk rule.
Table of Contents
- What Is the One Percent Rule and Why Does It Protect Your Account?
- What Is the Exact Position-Size Formula?
- When Should You Use 0.5%, 1%, or 2% Risk?
- How Do Position-Size Calculators Actually Work?
- Why Does Planned 1% Risk Become Bigger in Practice?
- How Do You Build a Pre-Entry Checklist Around the 1% Rule?
- What Does 18 Years of Live Trading Teach About Position Sizing?
- Guardrail, Not Dogma
- How Trader Gibkey Helps You Put This Into Practice
- Sources
- FAQ
What Is the One Percent Rule and Why Does It Protect Your Account?
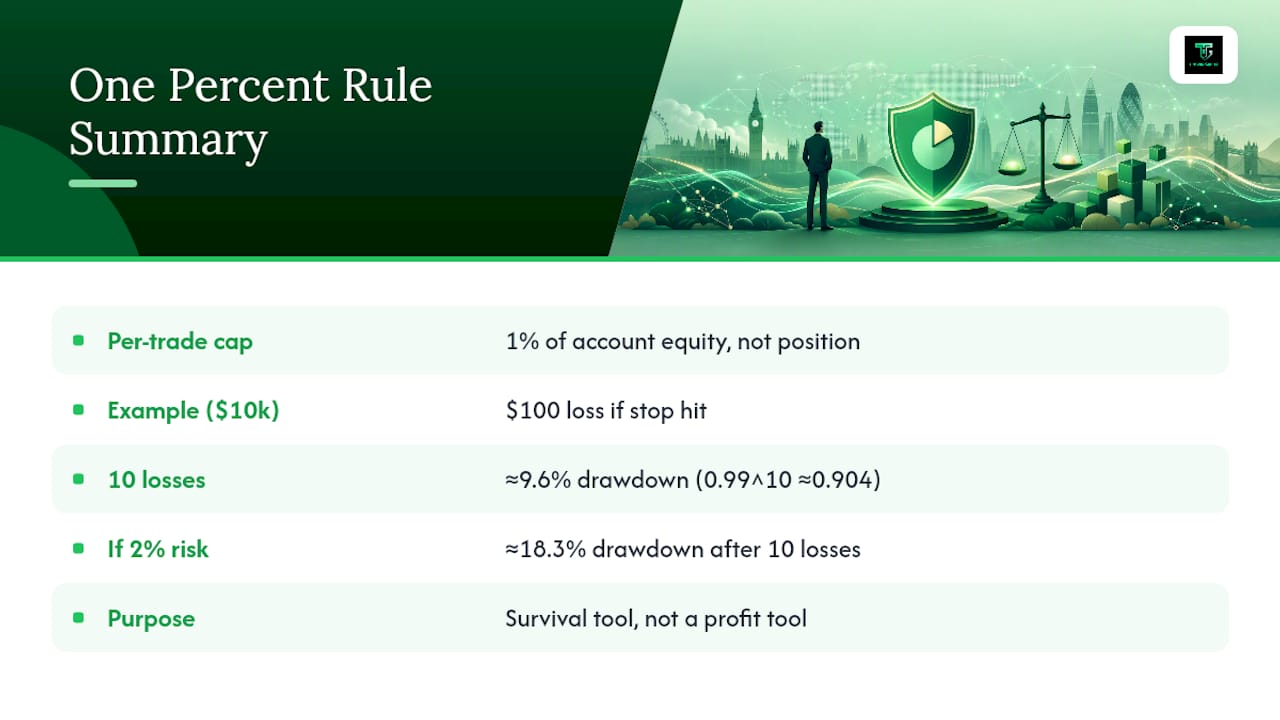
The 1% rule caps your planned loss per trade at 1% of account equity, not the size of the position itself. A $10,000 account risking 1% means you’re willing to lose $100 if your stop gets hit, even if the trade controls $50,000 worth of currency through leverage. Investopedia’s guidance on position sizing ties this directly to stop-loss planning: you decide the exit before you decide the size.
Pro Tip: Calculate your dollar risk first, then work backward to lot size. Traders who size the position first and place the stop second almost always end up risking more than they intended.
The math behind this is geometric, not linear. Lose 1% ten times in a row and you’re down roughly 9.6%, since each loss compounds on a smaller base (0.99 to the tenth power is about 0.904). Risk 2% instead and the same losing streak costs you about 18.3%. That gap compounds fast the longer the streak runs.
One caveat: sizing is a survival tool, not a profit tool. It just loses slowly enough that you can walk away with capital intact and figure out what went wrong.
What Is the Exact Position-Size Formula?
The formula behind every reputable calculator is the same:
Position size (lots) = (Account equity × Risk %) ÷ (Stop-loss in pips × Pip value per lot)
Pip value depends on lot size. A standard lot (100,000 units) moves roughly $10 per pip on most USD-quoted pairs, a mini lot (10,000 units) moves about $1, and a micro lot (1,000 units) moves about $0.10. Those figures shift slightly depending on the pair and current exchange rates, which is exactly why a calculator beats mental math.
Worked example 1: EUR/USD, USD account
- Account equity: $10,000
- Risk: 1% = $100
- Stop-loss distance: 50 pips
- Pip value (standard lot): $10
- Lot size: $100 ÷ (50 × $10) = 0.2 standard lots
Worked example 2: USD account trading USD/JPY
- Account equity: $10,000
- Risk: 1% = $100
- Stop-loss distance: 40 pips
- USD/JPY pip value per standard lot is quoted in yen and converted to USD at the current exchange rate, roughly $9 per pip when USD/JPY trades near 150
- Lot size: $100 ÷ (40 × $9) ≈ 0.28 standard lots
| Input | EUR/USD example | USD/JPY example |
|---|---|---|
| Account equity | $10,000 | $10,000 |
| Risk percentage | 1% ($100) | 1% ($100) |
| Stop-loss distance | 50 pips | 40 pips |
| Pip value per standard lot | $10 | ~$9 (rate dependent) |
| Resulting lot size | 0.2 lots | ~0.28 lots |
Micro accounts often hit a rounding wall here.
When Should You Use 0.5%, 1%, or 2% Risk?
There’s no single correct number, but there is a sensible default and a disciplined path to adjust it.
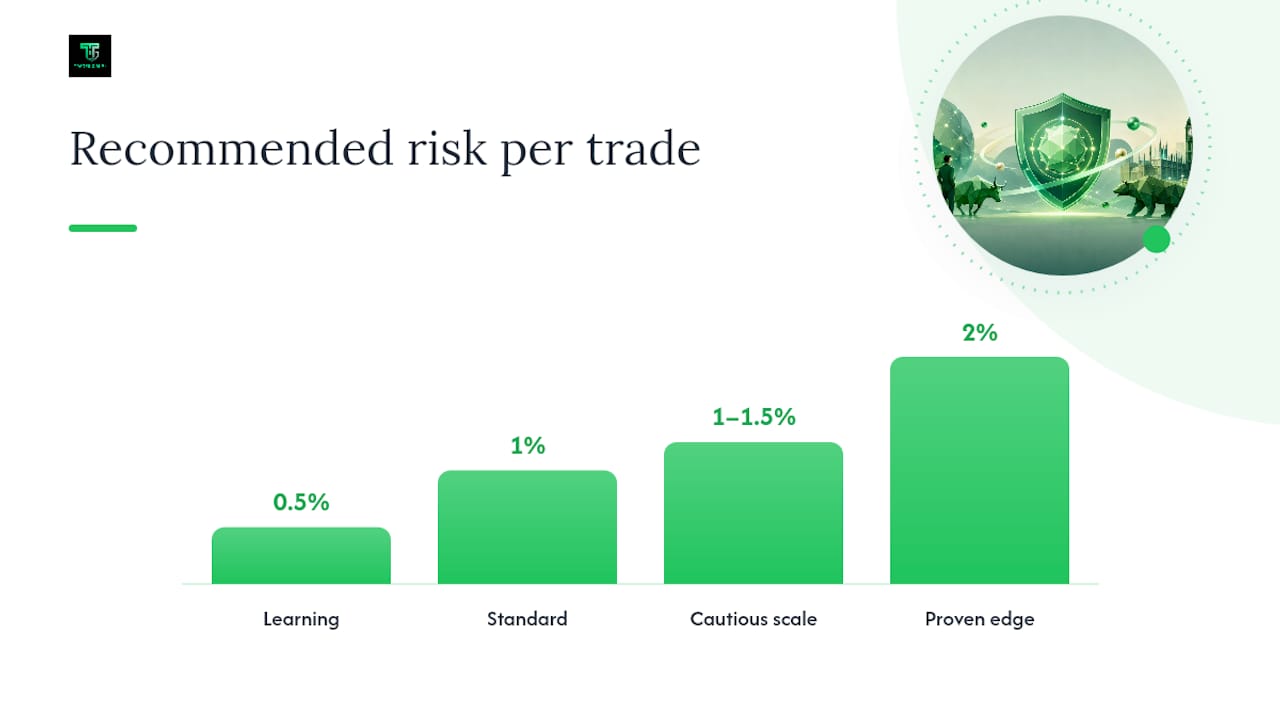
- 0.5% while you’re learning a new strategy or trading a new pair for the first few months.
- 1% once you have consistent execution and a stop-loss method you trust. This is the standard most experienced traders default to.
- 1% to 1.5% for cautious scaling after documented live results support it.
- 2% only with a proven edge and the emotional discipline to handle a rougher drawdown curve.
Forex-basics.com’s staging framework frames this as evidence-based scaling, not a confidence boost.
Your stop distance and timeframe matter too. Never tighten a stop just to unlock a bigger position. That’s not risk management, that’s rationalizing more exposure than your setup actually supports.
Pro Tip: If you find yourself tightening stops right after a winning streak, that’s tilt talking, not strategy. The stop belongs where the chart says invalidation happens, not where the math lets you size up.
How Do Position-Size Calculators Actually Work?
A calculator needs five inputs to do its job: account balance, risk percentage, stop-loss distance in pips, the currency pair, and your account’s base currency. Feed it those five numbers and it returns a lot of size.
The part traders miss is currency mismatch handling. Myfxbook’s calculator pulls the current exchange rate automatically when your account currency differs from the pair’s quote currency, which is exactly the adjustment that made the USD/JPY example above trickier than the EUR/USD one.
Before trusting any tool, check for a few features:
- Micro-lot support, since small accounts often need fractional sizing to stay near 1%.
- A visible pip-value table for the specific pair you’re trading.
- Some buffer allowance for slippage or spread, since raw pip math assumes a perfectly filled order.
Then cross-check manually. If it’s off by more than a rounding error, recheck your inputs before you trade.
Why Does Planned 1% Risk Become Bigger in Practice?
Your calculator’s output assumes a clean fill at your stop price. Live markets rarely cooperate that neatly. Larry Hite’s approach to risk, summarized by EBC Financial Group, treats this as a permanent feature of live trading, not an edge case.
Portfolio heat compounds the problem.
Practical mitigations worth building into your routine:
- Add a small spread or slippage buffer when calculating stop distance, especially around scheduled news events.
- Cap total simultaneous planned risk across correlated pairs, often somewhere around 3% to 4% of equity at once.
- Stagger entries into volatile setups rather than committing full size in one order.
- Hedge or reduce size when two open positions are pulling from the same currency exposure.
Correlated exposure across positions is why serious traders track heat, not just per-trade risk.
How Do You Build a Pre-Entry Checklist Around the 1% Rule?
Run this sequence before every single order, no exceptions:
- Define your invalidation point on the chart, then place the stop there, not at a round number.
- Measure the pip distance between entry and stop.
- Calculate lot size using the formula: (Equity × 1%) ÷ (Stop pips × pip value).
- Check your broker’s minimum lot size and round accordingly.
- Add a buffer for spread and slippage, especially on volatile pairs.
- Place the order with the stop attached, ideally as a bracket order so size and exit move together.
- Log the trade in your journal: entry, stop, size, risk percentage, and your reasoning.
Pro Tip: A bracket order that sets your stop and target at entry removes the temptation to “adjust” the stop after the trade moves against you. Automate what you can, because willpower is the least reliable part of any trading plan.
Most platforms support this natively, and pairing it with a proper risk versus reward checklist turns the 1% rule from a number you know into a habit you can’t skip.
What Does 18 Years of Live Trading Teach About Position Sizing?
Trader Gibkey’s approach to teaching Forex comes from over 18 years in live markets, not backtested theory. That experience shapes a core belief: price action strategies only hold up if the sizing behind them is disciplined enough to survive the inevitable losing streaks.
Journaling every trade is non-negotiable, because a track record you can’t review is a track record you can’t trust. For readers who want the fuller rule set this sits inside, the risk management rules every new trader should know and the practical exercises on position sizing go deeper than any single article can.
Guardrail, Not Dogma
The real value isn’t the number itself, it’s what a small, consistent fraction does to your head: fewer white-knuckle trades, clearer decisions, less tilt after a loss. Scale up when the evidence says you’re ready, never when frustration does the asking.
— Gabriel
How Trader Gibkey Helps You Put This Into Practice
Knowing the formula is one thing. Applying it consistently, trade after trade, under real market pressure, is where most traders actually struggle, and it’s exactly where Trader Gibkey’s structured courses and mentorship earn their keep.
Trader Gibkey’s offering isn’t a stack of PDFs, it’s live trading sessions, personalized mentorship, and journaling tools built around price action strategies, taught by someone who’s sized positions through 18-plus years of live markets rather than theory alone. Community access means you’re not calculating lot sizes alone at 2 a.m., wondering if your math is right. Between the structured courses, the mentorship packages, and the daily market analysis, you get a system that stages your risk the way this article recommends: small while you learn, standard once you’re consistent, and never scaled up without proof. If you’re ready to turn the 1% rule from a formula into a habit, visit the Trader Gibkey course and mentorship page to see which package fits where you are right now.
This article is general information, not a substitute for advice from a qualified financial advisor. Consult a qualified financial professional about your own circumstances before acting on anything here.
Sources
- Position Size Calculator | Lot Size Calculator | Myfxbook
- Manage Trading Risk: Effective Position Sizing Techniques | Investopedia
- Forex-basics
- Larry Hite’s 1% Risk Rule: How Much Should You Really Risk Per Trade? | EBC Financial Group
FAQ
Does the One Percent Rule Guarantee Profitability?
No.
Can Slippage Make My Real Loss Bigger Than 1%?
Yes.