
Confluence trading means entering a position only when multiple independent signals from different families align at the same price or time. Investopedia recognizes confluence as a core method for strengthening technical decisions, and Alpha Charts defines it as requiring signals from genuinely separate families: structure, momentum, volume, multi-timeframe alignment, and catalysts. One signal is a guess. Three independent ones are a case.
Three things you can do before your next trade:
- Require three independent confirmations before committing capital. Two factors often coincide by chance.
- Tag every trade in your journal with the specific confluence factors that triggered it, so you can validate which combinations actually work over many trades.
- Start with a reduced position size on any new confluence combination until you have tested it enough to trust it.
Tradergibkey’s price-action-first approach is built on exactly this framework, refined across 18+ years of live market experience.
Table of Contents
- What does confluence actually mean in trading?
- Why confluence improves your trades — and where it falls short
- Which signal families should you combine?
- How do you build a reproducible confluence setup?
- A confluence trade walkthrough: EUR/USD long setup
- Risk control that makes confluence a real edge
- Common mistakes traders make with confluence — and the fixes
- Tradergibkey’s three-rule framework for price-action-first confluence
- Pre-trade checklist you can use right now
- Key Takeaways
- Why price-action-first confluence is the only kind worth teaching
- Tradergibkey helps you practice confluence with structure and feedback
- Useful sources and further reading
- FAQ
What does confluence actually mean in trading?
Confluence, as Alpha Charts explains, increases signal reliability because diverse signals compensate for each other’s weaknesses. When different trader groups act on different signals at the same zone, liquidity clusters there, and that clustering is what makes the level hold.
The key word is independent. Two signals are independent only when they come from different families:
- Structural levels: HTF support/resistance, order blocks, prior swing highs/lows
- Multi-timeframe alignment: daily bias confirmed on the 4H, then triggered on the 15M
- Price-action triggers: rejection candles, engulfing bars, break-and-retest patterns
- Momentum indicators: RSI, MACD
- Volume and order flow: volume spikes, VWAP reclaims, delta divergence
- Session and time confluence: London open, New York open, end-of-week positioning
- Catalyst and fundamental alignment: news events, earnings, sector rotation
- Inter-market confirmations: DXY direction for forex pairs, bond yields for equities
RSI and Stochastic are both oscillators built on price. Stacking them does not give you two confirmations; it gives you one signal counted twice. An HTF support level plus a volume spike at that level, though, genuinely come from different families. That combination counts.
The scope matters too. In forex, the daily chart is your anchor and the 1H or 15M is your execution timeframe. In crypto, where volatility compresses cycles, you might anchor on the 4H and execute on the 5M. The principle stays the same across markets: higher timeframe sets the bias, lower timeframe provides the trigger.
Pro Tip: Before adding any indicator to your setup, ask yourself: “Does this measure something different from what I already have?” If it uses the same underlying price data in a similar way, it is not adding a new confirmation. It is adding noise.
Why confluence improves your trades — and where it falls short
The practical benefits are real and specific. A multi-factor zone gives you a narrower structural invalidation point, which means tighter stops and better risk-reward. When you know exactly where the setup breaks down, you can size up while keeping the same dollar risk. Confluence also filters out low-quality setups, which directly reduces overtrading and the emotional spiral that follows a string of impulsive losses.
Experienced traders treat confluence as a risk-mitigation framework. Waiting for multiple signals reduces overtrading and protects capital. Missing a trade is often preferable to forcing one without sufficient confluence.
That mindset shift is worth sitting with. Most traders lose money not because they pick the wrong direction but because they trade too often with too little reason.
The tradeoffs are equally real. You will take fewer trades. Some moves will happen without you, and that stings. If you require too many confirmations, you will reach analysis paralysis, where the setup looks perfect on paper but the entry window has already closed. There is also the risk of relying on a stale HTF level: a support zone that held six months ago may have been absorbed by institutional order flow since then. Combining technical and fundamental signals helps here — a news catalyst near a structural level is a live confirmation, not a historical one.
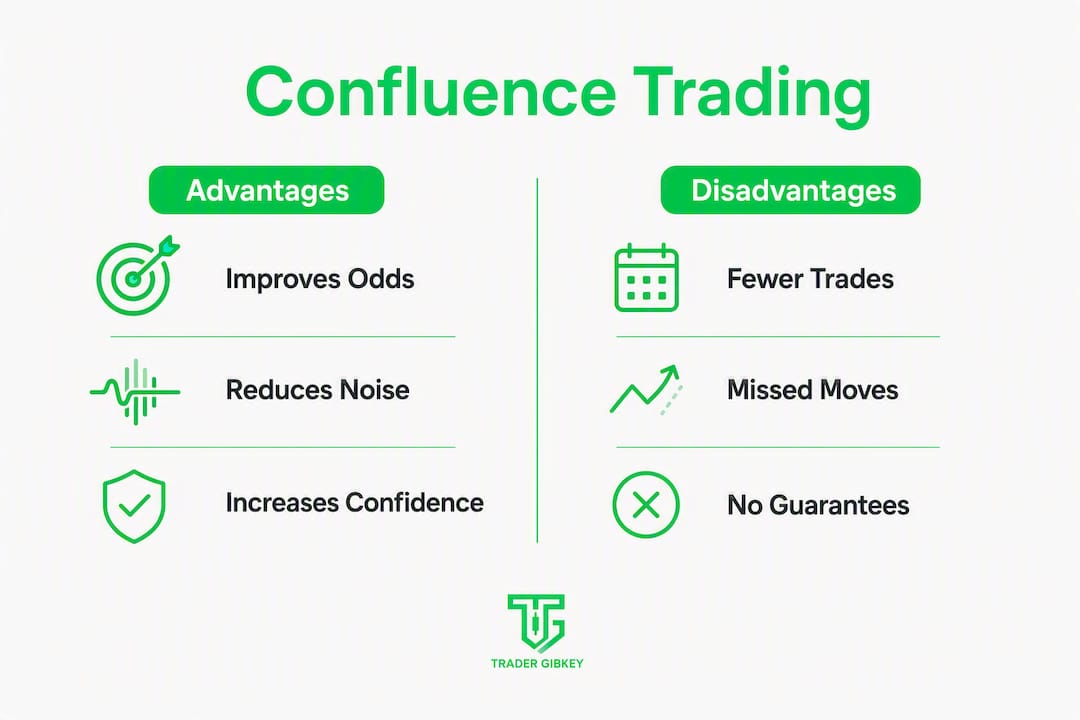
Confluence improves your odds. It does not guarantee outcomes.
Which signal families should you combine?
DYOR Academy notes that not all confluences are equal: diversity across families and multi-timeframe alignment are the two most powerful variables. The table below maps each signal family to example tools and the main independence risk to watch for.

| Signal family | Example tools | Independence note |
|---|---|---|
| Structural levels | Daily S/R, order blocks, swing highs/lows | Anchor for all other signals; do not count two structural levels as two families |
| Multi-timeframe alignment | Daily bias + 4H confirmation + 15M trigger | Each timeframe adds a genuine layer; same TF repeated does not |
| Price-action triggers | Rejection candles, engulfing bars, pin bars | Must close before entry; pattern alone is not confluence |
| Momentum | RSI, MACD | RSI + Stochastic = one family; RSI + MACD divergence = borderline; use only one oscillator |
| Volume and order flow | Volume spikes, VWAP, delta | Confirms participation; absent volume weakens any setup |
| Session/time | London open, NY open, weekly open | Filters timing; not a standalone signal |
| Catalyst/fundamental | Economic releases, earnings, sector flow | Strongest when it aligns with technical structure |
| Inter-market | DXY for forex, bond yields for equities | Adds conviction; especially useful around macro events |
A few practical notes on combining these:
- Use structural levels as your anchor, not your only signal.
- Momentum indicators are most useful when they show divergence, not just overbought/oversold readings.
- Volume confirms that other traders are acting at the same level. No volume, no conviction.
- Chart patterns like break-and-retest or double bottoms gain significant weight when they form at a structural level with volume confirmation.
How do you build a reproducible confluence setup?
The workflow below is adapted from the top-down methodology described by PipRider: start at the highest timeframe, work down to execution, and never enter without a trigger.
- Identify your HTF anchor. Pull up the daily or 4H chart. Mark the key structural level where price is likely to react: a prior swing high, a demand zone, a weekly open.
- Locate the confluence zone. Drop to your tactical timeframe (4H or 1H). Look for additional signals clustering near the HTF anchor: a VWAP reclaim, a momentum divergence, a session open level.
- Score your confluence. Award +1 for each independent signal family present. A starting threshold of three is the practitioner-recommended sweet spot: two is often coincidence, and four may mark a level already absorbed by institutions.
- Wait for the execution trigger. Drop to your entry timeframe (15M or 5M). Wait for a price-action candle to close confirming the move: a rejection wick, an engulfing bar, a break-and-retest close.
- Confirm volume or inter-market alignment. Check that volume is above average at the zone, or that a correlated market (DXY, sector ETF) is moving in the expected direction.
- Set your stop at structural invalidation. Place the stop below the last swing low for a long, or above the last swing high for a short, with a small liquidity buffer. The tighter stop a confluence zone allows is one of its clearest mechanical advantages.
- Calculate position size. Divide your risk amount (e.g., 1% of a $10,000 account = $100) by the stop distance in dollars. If your stop is $0.50 per share, you can take 200 shares. Risk stays fixed; position size adjusts to the stop.
- Pre-fill your journal entry before you click submit. Confluence factors, score, stop level, target, and R:R ratio.
Pro Tip: Scale into trades by confluence grade. At a score of 3, take half your normal size. At 4 or above, take full size. This keeps your risk proportional to your conviction and protects you during the validation phase.
A confluence trade walkthrough: EUR/USD long setup
Here is how the method looks in practice on a single trade.
Setup context:
- HTF anchor: Daily demand zone at 1.0820, tested twice without a clean break
- Tactical confirmation: 4H RSI divergence (price making lower lows, RSI making higher lows) at the same zone
- Execution trigger: 15M bullish engulfing candle closing above 1.0825 with above-average volume
Confluence score: 3 (structural level + momentum divergence + volume-confirmed price-action trigger)
Trade parameters:
- Entry: 1.0828 (candle close)
- Stop: 1.0798 (below the daily demand zone low, with a 8-pip buffer)
- Target 1: 1.0900 (prior 4H swing high, R:R ≈ 2.4:1)
- Target 2: 1.0950 (weekly resistance, R:R ≈ 4.1:1)
- Position size: 1% risk on $10,000 account = $100 risk; stop distance = 30 pips = $30 per mini lot; position = 3.3 mini lots
Invalidation rules:
- If price closes below 1.0798 on the 15M, exit immediately. Do not wait for the daily close.
- If price stalls at Target 1 and a bearish engulfing forms on the 1H, take partial profits and move stop to breakeven.
- Log the trade: confluence factors (structural, momentum divergence, volume), score (3), entry, stop, result, and notes on what confirmed or failed.
The setup did not require a perfect chart. It required three independent reasons to be there at the same time.

Risk control that makes confluence a real edge
Position sizing is where confluence stops being a philosophy and starts being a system. The formula is straightforward: risk amount ÷ stop distance in dollars = position size. Keep risk per trade at 1–2% of account. The stop distance comes from the structural invalidation point, not from a fixed pip count.
Confluence tightens that stop distance, which is the mechanical advantage. A zone with three confirming signals gives you a precise invalidation point. A vague setup forces a wide stop, which either reduces your position size to a rounding error or forces you to risk more than you should.
Key risk rules to apply:
- Stop goes at structural invalidation, not at a round number or a fixed distance.
- Add a small liquidity buffer (5–10 pips in forex, a few cents in equities) beyond the structural level to avoid being swept by normal noise.
- Track expectancy in your journal: (win rate × average win) minus (loss rate × average loss). A positive expectancy over 50–100 trades is your actual edge.
- Use a trading journal to log every trade with its confluence score, stop, result, and notes. Without this data, you are guessing at what works.
Fewer trades at higher confluence scores tends to produce better expectancy than high-frequency trading at low conviction. The math is on your side when you wait.
Common mistakes traders make with confluence — and the fixes
Most confluence failures come down to three patterns, all of which are fixable.
- Fake independence. Stacking RSI, Stochastic, and CCI and calling it three confirmations. Fix: map every indicator to its signal family before adding it. If two indicators share a family, keep only the one you trust more.
- Stale levels. Using a support zone from eight months ago without checking whether it has been tested and absorbed since. Fix: re-validate HTF levels at the start of each week. If price has closed through a level multiple times, it is no longer structural.
- Ignoring counter-confluence. Seeing three bullish signals and ignoring the bearish divergence on the HTF. Fix: treat counter-signals as a veto. If a meaningful signal from a different family points the other way, lower your allocation or skip the trade entirely.
Two psychological traps sit underneath all three mistakes. Confirmation bias makes you see the signals you want and filter out the ones you don’t. Fear of missing out pushes you to enter before the trigger closes, which removes the price-action confirmation from your score. Both are addressed by the same habit: before entering, list the bullish signals and the bearish signals explicitly. If you cannot name at least one counter-signal and explain why you are overriding it, the setup is not ready.
Trading psychology is where most traders leak money even when their technical analysis is sound. Confluence should reduce emotional trading, not give you a more elaborate justification for it.
Tradergibkey’s three-rule framework for price-action-first confluence
After 18+ years in live markets, the Tradergibkey approach to confluence comes down to three rules that hold across forex, stocks, and crypto.
Rule 1: Price action anchors everything. A structural level confirmed by a closed price-action candle is the non-negotiable starting point. Indicators support the case; they do not make it.
Rule 2: Require three independent confirmations for full size. Two factors are often coincidence. Four may mark a level that institutions have already absorbed. Three is the sweet spot for discretionary traders building a testable edge.
Rule 3: Journal and validate over 50–100 trades. You cannot know whether a specific combination of signals has positive expectancy until you have enough data. Fifty trades is a minimum sample. One hundred gives you real confidence.
The traders who improve fastest are not the ones who find the most signals. They are the ones who track which combinations actually work and cut the ones that don’t.
Practical steps you can take in a single session to start:
- Pick two signal families you already use and define exactly what counts as a confirmation from each.
- Run through the last 20 trades in your journal and score each one retroactively. Note which scored 3+ and which scored below.
- Set a rule: no trade below a score of 3 for the next 30 sessions. Track the results.
Pre-trade checklist you can use right now
Run through this before every entry. It takes under two minutes.
- HTF bias confirmed on daily or 4H chart?
- Confluence score at or above threshold (three independent families)?
- Trigger candle closed on execution timeframe?
- Volume or inter-market confirmation present?
- Stop level defined at structural invalidation?
- Position size calculated using risk % ÷ stop distance?
- Counter-confluence checked and documented?
- Journal entry pre-filled with confluence factors, score, and R:R?
One timing note: if you are trading forex, avoid entering in the first 30 minutes of the London or New York session unless the setup was fully formed before the open. Early-session volatility can sweep stops before the real move develops. Let the session establish direction, then look for your trigger.
Key Takeaways
Confluence trading works because three independent signals from different families create a self-reinforcing zone where multiple trader groups act simultaneously, producing tighter stops and higher-probability entries.
| Point | Details |
|---|---|
| Independence is the rule | Signals must come from different families; RSI + Stochastic counts as one, not two. |
| Three-factor threshold | Start with a score of 3; two is often coincidence, four may be a stale institutional level. |
| Tighter stops, better R:R | A multi-factor zone gives a precise invalidation point, allowing smaller stops without reducing conviction. |
| Validate over 50–100 trades | Track confluence scores and results in a journal to find which combinations have real positive expectancy. |
| Tradergibkey’s framework | Price-action anchor first, three independent confirmations for full size, journal every trade to build a tested edge. |
Why price-action-first confluence is the only kind worth teaching
Most traders who come to confluence do so after a losing streak. They add more indicators hoping that more data means more certainty. What they get instead is a chart covered in conflicting signals and no clear rule for when to act. The method becomes a crutch for indecision rather than a filter for quality.
The price-action-first approach cuts through that. A structural level on the daily chart, confirmed by a closed candle on the execution timeframe, is observable and testable. You can go back through five years of charts and count how many times that combination preceded a meaningful move. You cannot do that with a subjective “feeling” that the setup looks good.
What I have seen over years of teaching this method is that traders improve fastest when they narrow their confluence criteria down to two or three combinations and validate those specifically. Not every combination works in every market condition. A momentum divergence at a structural level works well in ranging markets. Multi-timeframe alignment with a volume spike works better in trending ones. The journal is what tells you which is which for your specific setup and timeframe.
The traders who struggle longest are the ones who keep adding signals instead of testing the ones they have. Fewer, better-defined combinations, tracked honestly over enough trades, is the path to a real edge.
Tradergibkey helps you practice confluence with structure and feedback
Most traders understand confluence in theory long before they can apply it consistently under live conditions. The gap between knowing the checklist and executing it without hesitation is where most traders stall, and that gap closes fastest with structured practice and direct feedback.

Tradergibkey’s courses and mentorship are built around exactly this: structured confluence checklists you apply in real time, live trading sessions where you see the method executed on live charts, journaling templates that track your confluence scores and results automatically, and mentor feedback on why a specific setup did or did not meet the threshold. The community gives you a place to share setups, get second opinions, and validate your thinking before you risk capital.
If you are ready to move from understanding confluence to trading it with confidence, visit Tradergibkey to see the current course and mentorship options. The structured path is faster than figuring it out alone.
Useful sources and further reading
- Confluence Trading: How to Build High-Probability Setups — Alpha Charts: The most detailed practitioner breakdown of the three-factor heuristic, fake independence, and counter-confluence rules.
- Confluence in Finance: Definition and Practical Applications — Investopedia: Authoritative general definition covering both portfolio and technical trading applications.
FAQ
What is confluence trading in simple terms? Confluence trading means only entering a trade when multiple independent signals from different categories align at the same price zone, increasing the probability that the level will hold.
How many confluence factors do you need before entering a trade? Three independent factors is the recommended threshold. Two is often coincidence; four may indicate a level already absorbed by larger players.
Does confluence trading work in forex, stocks, and crypto? Yes. The principle applies across all markets. The timeframes and signal families you weight may shift, but the core rule — independent confirmations from different families — stays the same.